Welcome to your ultimate guide on how to build a retaining wall in Australia! Whether you’re looking to enhance your outdoor space, manage a sloping garden, or prevent soil erosion, a well-built retaining wall can transform your landscape while offering long-term structural support. In this guide, we’ll walk you through the entire process, from planning and gathering the right materials to navigating Australia’s building regulations and ensuring proper drainage. By the end, you’ll feel confident tackling this DIY project, creating a durable, functional, and beautiful addition to your property that suits the unique demands of the Australian climate. Let’s dive in and get started!
To build a retaining wall in Australia, start by planning the wall’s location and checking local regulations for permits, especially for walls over 1 meter high. Choose durable materials such as concrete blocks, timber, or natural stone suited to your landscape. Dig a trench for the foundation, ensuring it’s deep enough for stability, and install proper drainage to prevent water damage. Lay the first course of blocks, ensuring it’s level, then stagger additional layers while backfilling with soil or gravel. For taller walls or complex sites, consult a professional to ensure long-term durability and compliance with Australian building standards.
- What Is A Retaining Wall And Why Do You Need One?
- Planning And Permits: What To Know Before You Start
- Choosing The Right Retaining Wall Materials
- Step-By-Step Guide: How To Build A Retaining Wall
- Important Considerations: Drainage, Height, And Stability
- DIY Vs. Hiring A Professional
- Maintenance Tips For A Long-Lasting Retaining Wall
- Common Mistakes To Avoid When Building A Retaining Wall
- FAQs: About How To Build A Retaining Wall Australia
- Conclusion
What Is A Retaining Wall And Why Do You Need One?
A retaining wall is a sturdy structure designed to hold back soil and create a stable, level area on sloping ground. Think of it as a barrier that keeps soil from shifting or eroding, which is particularly helpful in managing uneven landscapes, like a sloped backyard. In Australia, where many properties are built on hills or uneven terrain, retaining walls are a practical solution for homeowners looking to make the most of their outdoor space.
Why Build a Retaining Wall in Australia?
Australia’s diverse climate—ranging from heavy rainfall in some areas to extreme dry conditions in others—can cause significant soil erosion. Retaining walls helps prevent this by providing support to unstable soil, especially after storms. By stabilizing the ground, a retaining wall can prevent your garden or yard from washing away. Moreover, they add an aesthetic element to your landscaping. These walls can transform a sloping garden into a series of leveled terraces, perfect for planting or creating outdoor entertainment areas.
Retaining walls also offer protection from land movement, which can be a concern in areas with fluctuating weather patterns. For properties in bushfire zones, strategically placed retaining walls can even act as firebreaks, providing an added layer of safety.
Common Landscaping Challenges in Australia
Many Australian homeowners face challenges like uneven terrain, rocky soils, or steep slopes. Retaining walls not only helps to manage these issues but also allows for the creation of usable, flat spaces. They are essential in many landscaping projects where functionality and aesthetics are equally important.
By understanding the practical and aesthetic benefits of retaining walls, you can create a more stable, beautiful outdoor environment tailored to the unique Australian landscape.

Planning And Permits: What To Know Before You Start
Understanding the Legal Requirements
Before embarking on building a retaining wall in Australia, understanding the legal requirements is crucial. Permits are often required for walls over a certain height, typically around 1 meter, or if the wall is located close to property boundaries. These regulations vary depending on the local council, so it’s essential to verify the specific rules in your area. Most councils have online resources where you can easily check these requirements, such as the Australian Local Government Directory or your State Government’s Planning Portal. Ensuring that your project complies with these regulations will prevent any legal complications down the road.
Assessing Your Site
Proper site assessment is key to building a long-lasting retaining wall. Start by evaluating your landscape’s natural slope and soil composition. Different soil types require different construction approaches, with clay-heavy soils needing extra attention to drainage. This brings us to another critical point: ensuring that your site has proper drainage. Poor drainage can lead to water buildup behind the wall, causing structural issues over time. Installing drainage solutions, such as weep holes or proper backfill materials, can help prevent these problems from arising.
Setting a Budget
Whether you plan to DIY or hire a professional, budgeting for your retaining wall is essential. For a DIY project in Australia, you can expect material costs to start from approximately $250 per meter, depending on the materials used. Hiring a professional, however, can increase costs to around $700 to $1,500 per meter. Don’t forget to account for additional expenses, such as permit fees and potential excavation costs. Proper planning and budgeting can help avoid unexpected expenses and ensure your project runs smoothly.

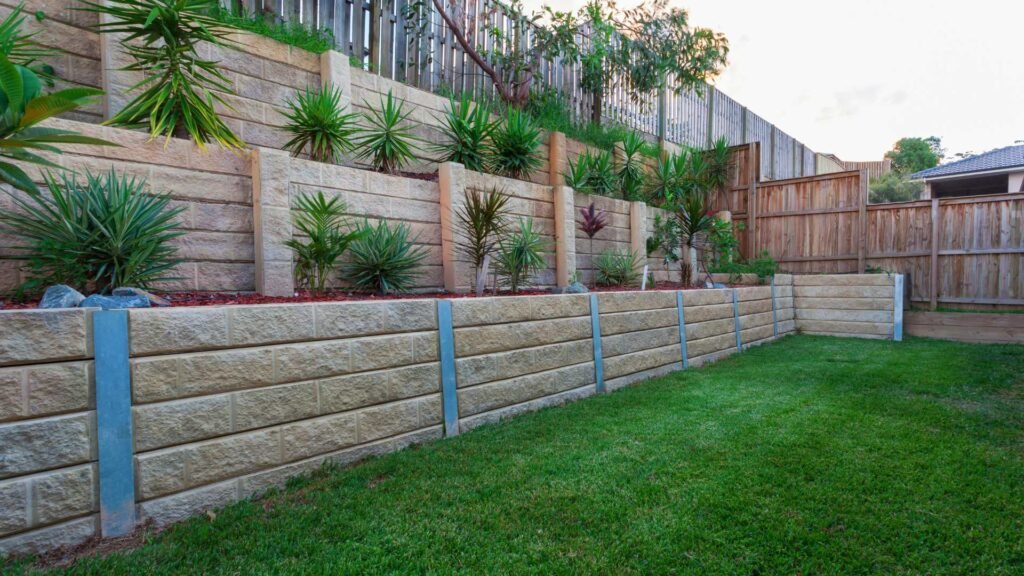
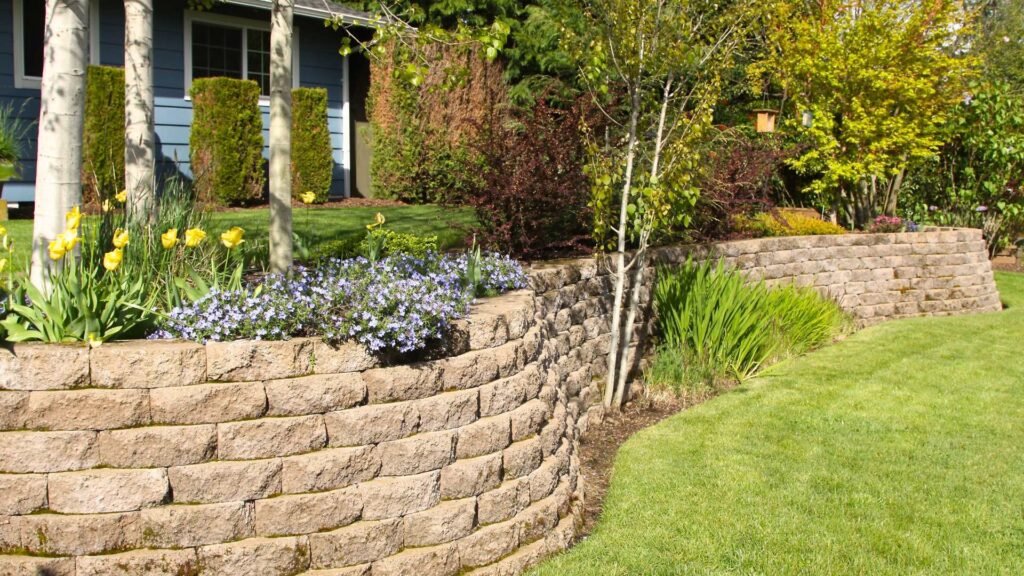
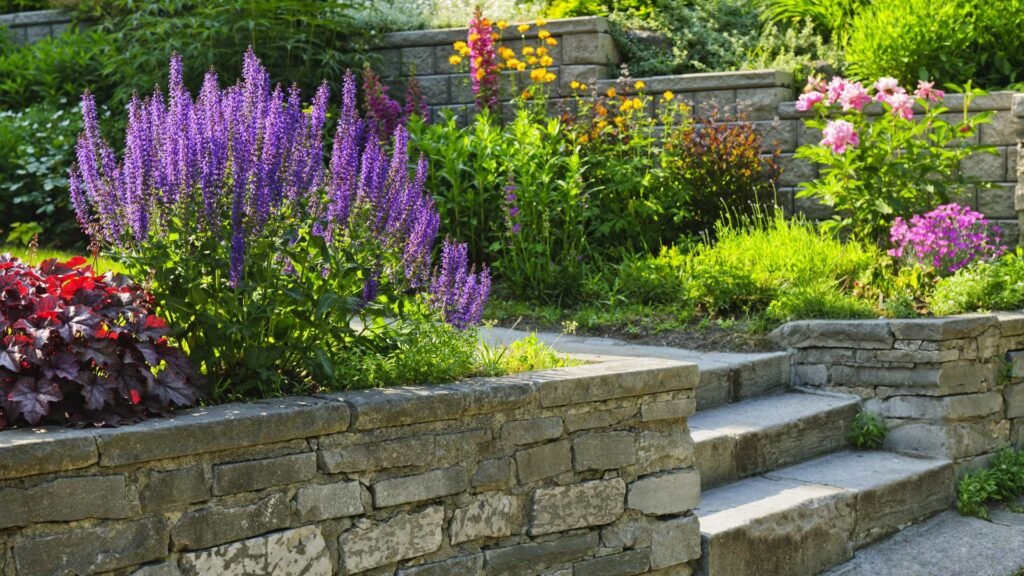
Choosing The Right Retaining Wall Materials
When selecting the right materials for your retaining wall, it’s essential to consider durability, aesthetics, and cost. In Australia, the climate and landscaping trends influence the types of materials commonly used. Here’s a breakdown of popular options:
Overview of Common Materials Used in Australia
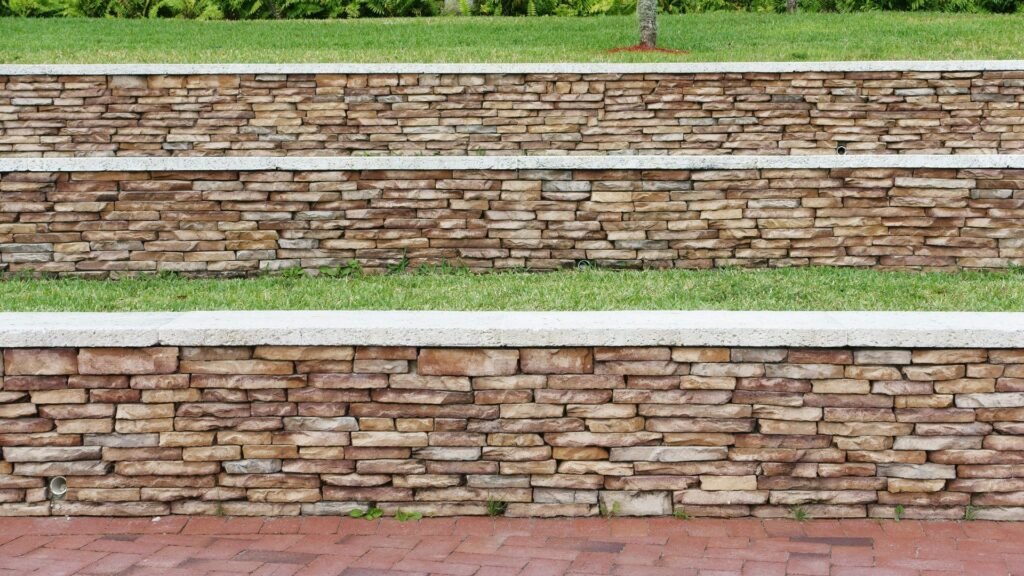
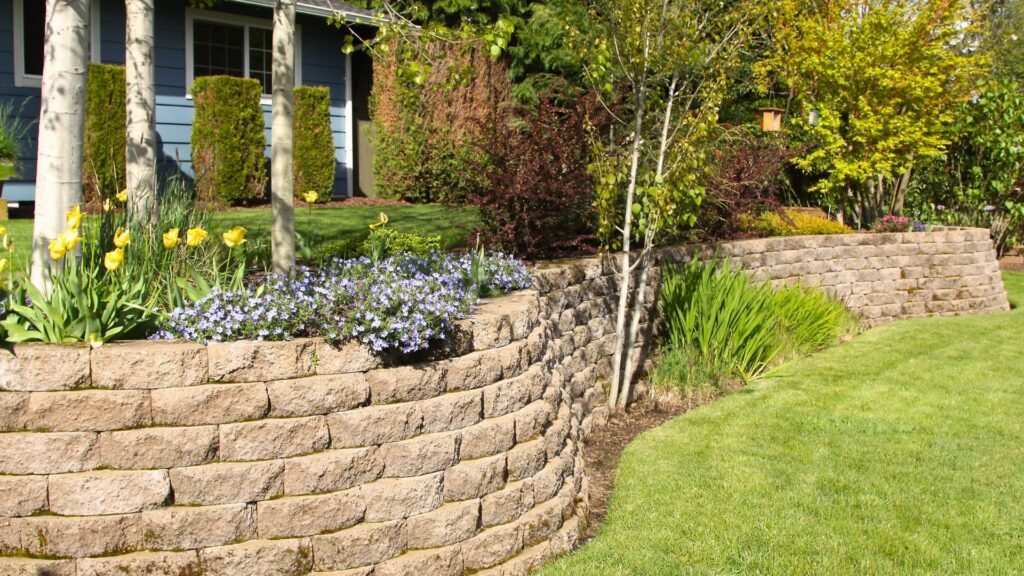
- Concrete Blocks: These are some of the most popular choices for retaining walls in Australia. Known for their durability and versatility, concrete blocks can be easily stacked, providing a clean and modern look. They are great for both residential and commercial projects and can withstand harsh weather conditions.
- Timber: Timber is a natural, cost-effective option that blends well with outdoor spaces. However, it’s important to note that timber may not last as long as other materials, especially in areas with high moisture levels. It’s ideal for smaller, more decorative walls but may require regular maintenance.
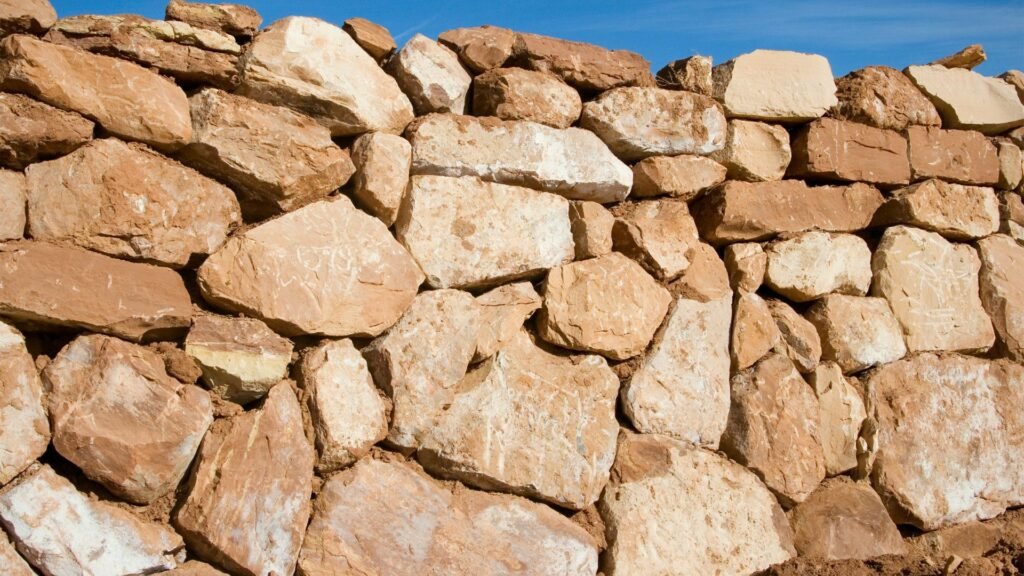
- Natural Stone: For a timeless and rustic appearance, natural stone is an excellent choice. It complements Australian gardens beautifully, adding character and a sense of permanence. While more expensive, its longevity and aesthetic appeal make it a worthwhile investment.
- Brick: Offering a clean, modern appearance, brick retaining walls can elevate the look of any landscape. Although more costly than some alternatives, bricks are sturdy and require minimal maintenance, making them a long-term option.
- Gabion Baskets: This unique choice consists of wire cages filled with rocks, providing both stability and an industrial look. Gabion baskets are gaining popularity for their sustainable and modern aesthetic.
Pros and Cons of Each Material
Concrete blocks and bricks offer high durability but come at a higher cost. Timber is affordable but less durable. Natural stone is visually appealing but expensive, while gabion baskets are eco-friendly and unique but may not suit all landscapes.
Environmental Considerations
In line with Australia’s growing focus on sustainability, using recycled materials or eco-friendly options like gabion baskets can reduce environmental impact. Always consider the long-term sustainability of your material choices to align with Australia’s eco-conscious trends.

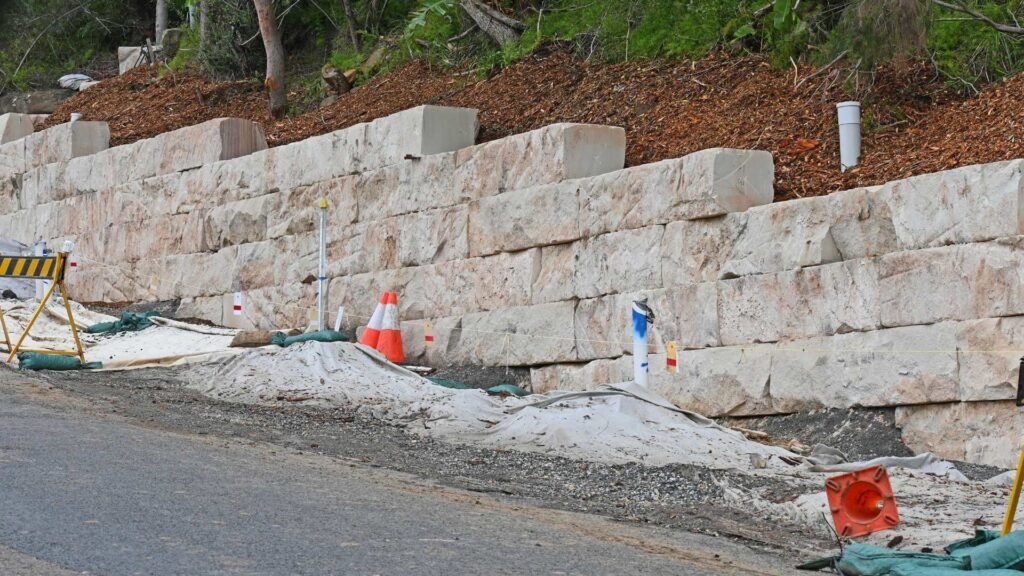
Step-By-Step Guide: How To Build A Retaining Wall
Building a retaining wall may seem like a daunting task, but with the right guidance and materials, it can be a manageable project for any DIY enthusiast. Retaining walls serve both aesthetic and functional purposes by leveling sloped areas, preventing soil erosion, and enhancing landscape design. Follow this step-by-step guide to create a strong, durable retaining wall that will last for years.
Step 1: Mark Your Area
Before you start digging, it’s essential to carefully mark the area where your retaining wall will be built.
- Measure and Plan: Begin by measuring the length and height of your wall. Ensure that you account for the correct height to retain the soil properly. If the wall is over four feet tall, consider consulting a professional or structural engineer to ensure the design is safe and effective.
- Mark with Stakes and String: Once you have the measurements, drive stakes into the ground at each corner of your future wall. Stretch a string line tightly between the stakes to establish a clear boundary and ensure the alignment is straight. This simple step helps you maintain accuracy and ensures your wall won’t deviate from the desired design.
- Tip: Use a level to check that your string line is horizontal, as this will guide your wall’s height consistency.
Step 2: Digging the Trench
One of the most critical steps in building a retaining wall is digging a solid trench for the foundation.
- Depth of the Trench: The depth of the trench should be about one-third the height of your wall. Generally, for most retaining walls, this will be between 300mm to 600mm deep, depending on the height and load. The trench provides a stable base and prevents the wall from shifting over time.
- Prepare the Base: After digging the trench, fill it with about 100mm of compacted gravel or sand. This base layer will create a stable, drainable foundation for your wall. Use a tamper to ensure the gravel is packed tightly and evenly distributed. A well-prepared base ensures the longevity and stability of your retaining wall.
Step 3: Laying the Foundation
The foundation layer sets the tone for the entire wall, so precision is key here.
- First Course of Blocks: Place your first row of blocks directly on the compacted gravel base. This first course must be perfectly level, as any small error at this stage will be amplified as the wall grows taller. Use a level to check every block.
- Importance of a Level Foundation: A well-laid foundation ensures the wall won’t tilt or collapse under pressure. Take your time with this step, adjusting the blocks and compacting the base further if needed. This is the most important layer because it supports the entire structure.
Step 4: Staggering the Layers
For strength and stability, staggering each layer of blocks or materials is a crucial technique.
- Offsetting Blocks: As you build the wall higher, stagger each block or stone by offsetting it from the one below. This creates an interlocking effect, adding structural integrity to the wall. It’s especially important if you’re using materials like bricks or stones, as the staggered design prevents vertical seams that could weaken the wall.
- Different Materials: Depending on whether you’re using bricks, natural stone, or manufactured blocks, the approach may vary slightly. For bricks and concrete blocks, offset them by half a block on each layer. Natural stones, while more irregular, should still follow the same principle of staggering for stability.
Step 5: Incorporating Drainage
Proper drainage is essential for retaining walls. Without it, water buildup behind the wall can lead to cracks, shifting, or even complete failure.
- Installing Drainage Pipes: To prevent water from pooling behind the wall, install a perforated drainage pipe at the base of the wall, slightly sloped towards an exit point. This allows water to flow away from the wall naturally.
- Adding Gravel: Fill the area directly behind the wall with gravel. This gravel layer, typically 300mm deep, promotes water drainage and reduces pressure on the wall. Without proper drainage, the wall may buckle over time due to hydrostatic pressure.
Step 6: Backfilling
Backfilling is the process of filling the area behind the wall with soil or other materials. This step ensures that the wall remains sturdy and supports the surrounding landscape.
- Compacting the Soil: After each layer of blocks or stones, backfill the area behind the wall with soil or gravel, compacting it in 100mm layers. Use a tamper or plate compactor to ensure the soil is firmly packed. This prevents future settling that could undermine the stability of your wall.
- Gradual Backfilling: Don’t rush this step. Compacting in small layers helps maintain wall stability and prevents any unexpected shifts or collapses.
Step 7: Capping the Wall (If Necessary)
To give your retaining wall a polished, finished look, you can add decorative caps to the top.
- Choosing Capping Materials: The caps can be made of decorative stone, bricks, or blocks that match the rest of your wall. These caps not only add aesthetic appeal but also protect the structure from erosion and wear.
- Installing the Caps: Use a construction adhesive designed for outdoor use to secure the caps in place. Press each cap firmly into position, ensuring they are aligned and level. This final touch will complete the wall, giving it a professional look.
Building a retaining wall is a rewarding project that can add both beauty and functionality to your outdoor space. By following these step-by-step instructions, you’ll ensure that your retaining wall is strong, stable, and long-lasting. Always take your time with each step, especially when preparing the foundation and incorporating drainage, as these factors will significantly impact the overall durability of your wall.

Important Considerations: Drainage, Height, And Stability
When constructing a retaining wall in Australia, there are several critical factors to consider to ensure both the functionality and safety of your structure. Let’s explore the three most important aspects: drainage, height, and stability.
Drainage Solutions for Australian Climates
Australia’s diverse climate, particularly in regions prone to heavy rainfall or occasional flooding, makes proper drainage essential for retaining walls. Poor drainage can cause water to build up behind the wall, leading to pressure that may result in wall failure. Installing effective drainage solutions like weep holes, gravel backfill, and proper water channels can prevent waterlogging and help your wall last longer. For areas with extreme weather conditions, consulting a local expert on drainage requirements can help avoid potential disasters in the future.
Height Regulations in Australia
Height restrictions for retaining walls vary by location, but as a general rule in Australia, DIY walls should not exceed 1 meter without engineering approval. Walls taller than this may require professional input to ensure compliance with local regulations and safety standards. Building a retaining wall above the allowable height without approval can result in fines, costly modifications, or even a forced demolition of the structure. Always check your local council’s guidelines before starting any project.
Ensuring Stability
Stability is key to a retaining wall’s longevity. For DIY walls, ensuring proper slope and incorporating reinforcement is vital, especially for taller structures. Reinforcements such as geogrid or steel rods can add strength and prevent the wall from buckling under pressure. Additionally, ensuring the base is solid, well-leveled, and made from durable materials like compacted gravel will help maintain the wall’s stability over time, minimizing the risk of collapse.
By addressing these key considerations, you can create a durable and compliant retaining wall that withstands the test of time and the elements.

DIY Vs. Hiring A Professional
When it comes to building retaining walls, many homeowners face the dilemma of doing it themselves or hiring a professional landscaper. Both options have their pros and cons, and the choice depends on the project’s complexity and your personal expertise.
Pros of DIY
Opting for a DIY approach can be a great way to save on labor costs while allowing you to customize the design to your liking. For those who enjoy hands-on projects, building your own retaining wall can be a rewarding experience that brings personal satisfaction. You also have the freedom to source materials and adjust your plans as needed without relying on a contractor’s schedule.
When to Call a Pro
However, some retaining wall projects can be too complex for the average DIYer. If you’re dealing with tall walls, steep slopes, or difficult soil conditions, it may be time to consult a professional. Walls over a certain height often require specialized engineering to ensure they are safe and long-lasting. Professional landscapers have the experience and tools needed to tackle these challenging projects, saving you from potentially costly mistakes in the future.
In short, smaller, straightforward projects are great for DIY, but larger or more technical tasks often benefit from professional expertise.

Maintenance Tips For A Long-Lasting Retaining Wall
Proper maintenance is crucial for extending the lifespan of your retaining wall. Here are a few essential tips to keep your wall in excellent condition:
Regular Inspections
It’s important to inspect your retaining wall periodically for any signs of wear and tear. Look for cracks, leaning, or bulging sections, as these may indicate structural stress or potential failure. Catching these issues early can prevent larger, more expensive problems down the line.
Preventing Water Damage
Water is one of the biggest threats to the integrity of retaining walls. Ensuring proper drainage is key. Check that the drainage system, like weep holes or drains, is functioning correctly, and clear away any blockages. Water pooling behind the wall can create pressure and lead to cracking or collapse.
Fixing Minor Issues
If you notice small cracks or loose stones or bricks, address them promptly. Use appropriate materials like mortar or caulk to seal cracks before they worsen. Re-stabilizing loose stones can also prevent further shifting and maintain the wall’s stability.
By following these simple maintenance steps, your retaining wall will stay sturdy and beautiful for years to come.

Common Mistakes To Avoid When Building A Retaining Wall
Building a retaining wall may seem straightforward, but several common mistakes can lead to costly failures. One of the most frequent issues is improper drainage. Without proper drainage systems in place, water can accumulate behind the wall, causing pressure that may eventually lead to collapse.
Another critical mistake is using the wrong materials. The materials you select should not only complement the aesthetic of your landscape but also be appropriate for the local environment. For example, certain types of soil or weather conditions may require stronger, more durable materials. Failing to account for these factors can shorten the wall’s lifespan.
Lastly, skipping the planning stage is a costly error. Many homeowners rush into construction without a solid design, overlooking crucial aspects like wall height, soil type, and structural reinforcement. Proper planning is essential for avoiding unexpected expenses and ensuring the long-term stability of the wall.
By avoiding these common mistakes, you’ll ensure your retaining wall stands strong for years to come.

FAQs: About How To Build A Retaining Wall Australia
Yes, in most areas of Australia, you’ll need council approval if your retaining wall exceeds 1 meter in height. The specific regulations vary by state and local council, so it’s essential to check with your local authorities before beginning construction.
The best material depends on the landscape and your personal preferences. Common options include concrete blocks for durability, timber for a natural look, and natural stone for aesthetics. In areas with harsh climates, concrete blocks or stone tend to offer better longevity.
The foundation, or trench, should generally be around 300 to 600mm deep, depending on the height of the wall. A deeper foundation provides stability, especially for walls taller than 1 meter. Ensuring a solid foundation is critical for the wall’s long-term stability.
Proper drainage is essential to prevent water from building up behind the wall, which could lead to structural failure. You can install drainage pipes at the base of the wall and backfill with gravel to allow water to flow away from the structure. Make sure to incorporate a slope in the design to direct water away.
You can build a retaining wall yourself if it’s a smaller project, typically under 1 meter tall, and if you’re comfortable with DIY work. For taller walls or if you’re unsure about the landscape’s stability, it’s best to consult a professional to ensure safety and compliance with regulations.
The cost varies based on the materials used, the size of the wall, and whether you’re doing it yourself or hiring a professional. A DIY retaining wall made of timber may cost around $150 to $250 per square meter, while stone or concrete block walls could range from $300 to $500 per square meter.
A DIY retaining wall should generally not exceed 1 meter in height without professional consultation. Walls higher than this often require engineering and council approval to ensure they are structurally sound and safe.
Basic tools required include a shovel, level, string line, wheelbarrow, rubber mallet, and compacting tool. You may also need a concrete saw if working with concrete blocks, and a trenching spade for digging the foundation.
Common mistakes include inadequate drainage, failing to dig a proper foundation, using the wrong materials for your soil type, and not ensuring the wall is level. Skipping steps during the construction process can compromise the wall’s long-term stability.
The time it takes to build a retaining wall depends on the size and complexity of the project. A simple, small wall may take a weekend to complete, while larger or more complex walls could take several days to weeks, especially if you need to get permits or hire professionals.
Conclusion
In conclusion, building a retaining wall requires careful planning and execution to ensure durability and functionality. By following the key steps—preparing the site, choosing the right materials, constructing a solid base, and ensuring proper drainage—you can create a structure that not only serves its purpose but enhances the aesthetic appeal of your outdoor space. Don’t hesitate to get started; with the right preparation, a well-built retaining wall can transform your landscape, adding both beauty and value to your property. If you have any questions or need further guidance, feel free to leave a comment or ask for help. We’d also love to see photos of your finished DIY projects!
About the Author:
Mike Veail is a recognized digital marketing expert with over 6 years of experience in helping tradespeople and small businesses thrive online. A former quantity surveyor, Mike combines deep industry knowledge with hands-on expertise in SEO and Google Ads. His marketing strategies are tailored to the specific needs of the trades sector, helping businesses increase visibility and generate more leads through proven, ethical methods.
Mike has successfully partnered with numerous companies, establishing a track record of delivering measurable results. His work has been featured across various platforms that showcase his expertise in lead generation and online marketing for the trades sector.
Learn more about Mike's experience and services at https://theleadguy.online or follow him on social media: